


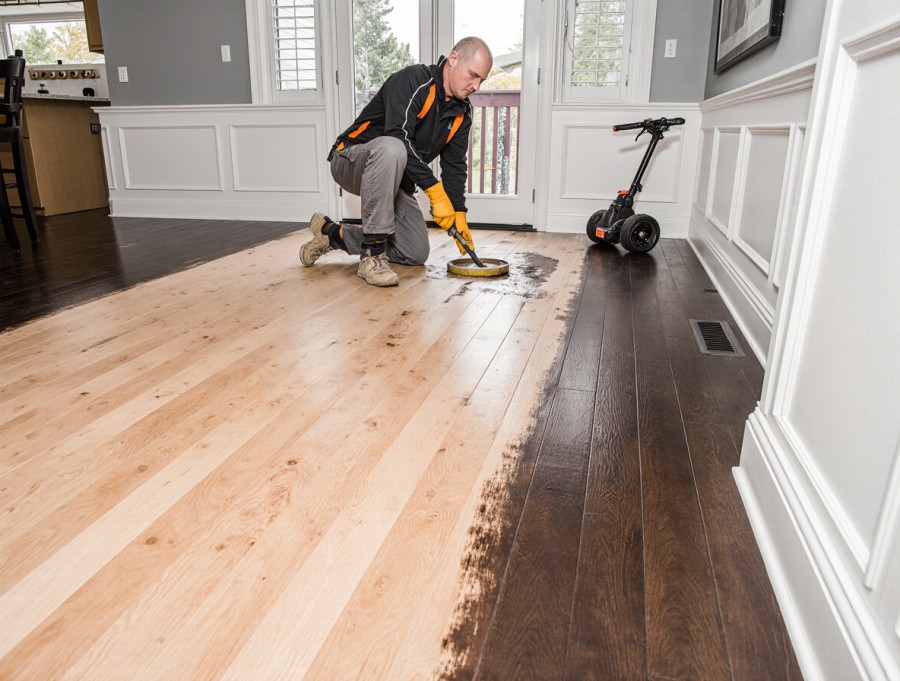
Staining is one of the most effective ways to change the look of a timber floor without replacing it. A well-chosen stain can turn tired orange-toned boards into a rich walnut, give a cool modern grey to a pale floor, or simply even out a mix of old and new boards after a renovation.
It is also one of the least forgiving floor finishes to get right. Stain shows every sanding mark, every lap line and every difference between timber species. This guide covers how staining timber floorboards actually works, which Sydney timbers take stain well, what the process involves and how long it takes, so you can make the right call for your home. It is based on what we have learned across 25+ years and more than 2,500 floor projects at Revolution Floor Sanding.
Quick answer: Staining adds colour to freshly sanded bare timber, then a clear topcoat seals and protects it. Stain can only make timber darker, not lighter, and the timber species affects the result as much as the colour you choose. Most Sydney staining projects take 2 to 4 days from sanding to final coat.
What Does Staining Timber Floorboards Actually Do?
A floor stain is a coloured liquid that soaks into the top layer of freshly sanded timber. The colour sits in the wood fibres themselves, which is why stain enhances the grain rather than hiding it the way paint does.
What stain does not do is protect the floor. On its own it offers almost no resistance to foot traffic, spills or UV. Every stained floor needs a clear protective topcoat, usually a polyurethane, applied over the top once the stain has dried. So when people talk about staining floorboards, they really mean a two-stage system: colour first, protection second.
Staining vs tinting vs polishing
- Polishing (sanding and coating with a clear finish) keeps the natural colour of the timber, which usually deepens a little once coated.
- Tinting mixes colour into the coating itself. It is quicker, but the colour sits in the finish rather than the timber, so a deep scratch or worn traffic path can show lighter wood underneath.
- Staining puts the colour into the bare timber, then seals it under a clear topcoat. It gives the most even, longest-lasting colour change and wears more gracefully.
For most Sydney homes wanting a real change in tone, staining before coating is the better long-term option. Our sanding and polishing service covers clear finishes if you would rather keep your timber’s natural colour.
Can You Stain Any Timber Floor? How Common Sydney Timbers Take Stain
Timber species has a bigger influence on the final result than the stain colour you pick from a chart. The same stain can look completely different on two floors in the same street. Here is how the timbers we see most often across Sydney tend to behave.
- Blackbutt: Pale, fairly even grain and one of the most versatile timbers for staining. It suits everything from soft greys to deep browns.
- Tasmanian oak and Victorian ash: Light-coloured and open-grained, so they absorb stain readily. Popular for contemporary browns and greys, though the open grain can make dark colours look more dramatic than expected.
- Jarrah: Already a deep red, so stain mainly shifts its tone rather than transforming it. Browns and dark walnuts work well. Pale colours do not, because stain cannot make timber lighter.
- Spotted gum: Known for strong natural colour variation and a wavy grain. Stain softens the contrast between boards but rarely removes it, which many homeowners see as part of its character.
- Pine (Baltic, radiata and cypress): Softwoods are the trickiest to stain. They absorb unevenly and can look blotchy, and cypress pine has a strong yellow tone and plenty of knots. Staining pine floorboards is possible, but a test patch is essential, and lighter or mid-tone colours are usually more forgiving.
Floating floors and engineered boards are a different story. Many have a factory-applied finish and a thin timber wear layer that cannot be sanded deeply enough to take stain, and laminate cannot be stained at all. If you are not sure what your floor is made of, a quick on-site assessment will tell you.
Older homes also often have a mix of original boards and later patch repairs, sometimes in a different species. These can take stain differently, so it is worth knowing before you commit to a very dark or very light colour.
Stain Only Goes Darker: What If You Want a Lighter Floor?
This is the most common misunderstanding we come across. Stain adds colour; it cannot remove it. If you have orange jarrah or yellowed pine and want a pale Scandi or coastal look, a stain alone will not get you there.
Instead, the timber’s natural colour needs to be lifted first. Timber floor bleaching chemically lightens the wood itself, and lime washing adds a soft white tone that lets the grain show through. Both can be combined with a pale stain on top for more control over the final colour. Our guides to bleaching timber floors and lime washing and whitewashing explain how each process works.
How to Choose a Timber Floor Stain Colour
Colour charts and online photos are a starting point, not a decision. A few practical rules make a big difference.
- Test on your own floor: A sample board in a shop is a different timber under different light. We apply test patches directly to your sanded floor so you can see the real result before committing.
- Look at it at different times of day: North-facing rooms in Sydney get warm afternoon light that can push browns towards red. South-facing rooms can make greys feel cold.
- Think about dust, pets and kids: Very dark floors show dust, pet hair and fine scratches more than mid-tones. Very light floors show dirt. Mid-browns and greys are the most forgiving for busy homes.
- Consider the sheen as well as the colour: A matte or satin finish over stain looks more natural and hides wear better than high gloss.
- Factor in the rest of the room: Joinery, wall colours and furniture all shift how a floor colour reads.
For colour ideas, our post on timber flooring colour trends in Sydney covers the tones homeowners are choosing this year, from natural blonde to rich walnut.
The Floor Staining Process, Step by Step
Professional floor staining follows a set sequence. Skipping or rushing any stage is where most patchy results come from.
1. Assessment
We check the timber species, board condition, any previous coatings or stains, old patch repairs and how much sanding the boards can take. This is also when we talk through the look you are after.
2. Sanding back to bare timber
All old finish must come off so the stain can soak in evenly. Sanding is done in stages from coarse to fine grits, with careful edge and corner work. This stage matters more for staining than for a clear finish, because stain collects in any scratch or swirl mark and makes it stand out. Our dustless sanding equipment keeps the rest of the home clean while this happens.
3. Cleaning and preparing the surface
Every trace of dust is removed before any colour goes down, since leftover particles cause rough, blotchy spots. Depending on the timber and colour, the surface may also be prepared to help it absorb stain more evenly.
4. Test patches
A few colour options are applied to a small area of your actual floor. Once you have seen them in your own light, we lock in the colour.
5. Applying the stain
Stain is applied by hand, working along the grain in manageable sections and keeping a wet edge so there are no overlap lines. Excess stain is removed so it does not sit on the surface or bleed into the topcoat later.
6. Sealing with a protective topcoat
Once the stain is fully dry, several coats of clear finish go on top, with a light sand between coats. This is what gives the floor its durability and sheen. We use water-based or solvent-based coatings depending on the timber, the colour and how the room will be used.
7. Curing
The finish keeps hardening for some time after it feels dry to touch. Light foot traffic comes first, then furniture, then rugs once the coating has properly cured.
How Long Does Timber Floor Staining Take?
Most residential staining projects in Sydney take around 2 to 4 days from start to finish. The main variables are:
- Floor area and condition: A single room is quicker than a whole house, and boards needing repairs or heavy sanding add time.
- Drying time between stages: Stain must be completely dry before any topcoat goes on, or the finish can fail to bond or bleed colour. This step cannot be rushed.
- Weather: Humidity and cool temperatures slow drying. Muggy Sydney summers and damp winter weeks can both stretch the timeline.
- The coating system: Water-based finishes generally allow quicker recoating than solvent-based ones.
We give you a clear timeline at quoting stage, including when you can walk on the floor and when furniture can go back.
Oil-Based vs Water-Based Stains and Finishes
Both stains and topcoats come in oil or solvent-based and water-based versions, and they need to be compatible with each other.
- Solvent and oil-based products tend to give richer, warmer colour and a slight amber tone that deepens over time. They have a stronger odour and longer drying times.
- Water-based products have low odour, dry faster and keep colours truer, which suits greys and cooler tones that you do not want to yellow.
Choosing the right combination depends on the timber, the colour and your household. It is one of the details we sort out during the assessment.
Should You Stain Floorboards Yourself or Hire a Professional?
DIY staining is possible, especially for a small area of even, well-prepared boards. But staining is far less forgiving than a clear coat, and the most common problems are hard to fix:
- Sanding marks from a hired drum sander or edger become very obvious once stain goes on.
- Lap marks and streaks appear when stain dries before the next section is blended in.
- Pine and other softwoods turn blotchy without the right preparation.
- Excess stain bleeds back through the topcoat, or an incompatible finish fails to cure.
In most cases the only fix for a bad stain job is to sand the whole floor back to bare timber and start again, which costs more than getting it right the first time. If the floor is the centrepiece of a renovation or sale, professional staining is usually the safer investment. Our timber floor staining in Sydney service covers everything from assessment and test patches through to the final coat.
Looking After a Stained Timber Floor
A stained floor needs the same care as any coated timber floor, with a little extra attention to traffic areas, because worn spots show more clearly against a coloured background.
- Put felt pads under furniture legs and mats at entry doors to catch grit.
- Sweep or vacuum regularly, and damp mop with a pH-neutral timber floor cleaner rather than a wet mop.
- Wipe up spills promptly and avoid steam mops and harsh chemicals.
- Book a maintenance recoat before traffic paths wear through the topcoat into the stain. Catching it early means a light sand and recoat rather than a full re-stain.
If your floor is already worn or damaged, our timber floor restoration service can bring it back before any new colour goes on. Stained stairs need the same care; see our stair treads and risers service for matching your staircase to your floors.
Thinking About Staining Your Floors?
Revolution Floor Sanding is a family-run Sydney business with more than 25 years’ experience and 2,500+ completed projects. We will assess your timber, apply test colours on your own floor and give you an honest view of what will and will not work.
Call Luis on 0406 261 606, or send us a few photos or a short video of your floor for a free, no-obligation quote. You can also learn more about our timber floor staining service.
Frequently asked questions
Can you stain floorboards without sanding?
Not properly. Stain needs to soak into bare timber, and any existing polish or sealer will stop it absorbing. Without sanding you get a patchy result or colour that sits on the surface and wears off quickly. Tinted coatings are the only no-sand option, and they come with their own wear issues.
Can you stain over an existing polish?
No. The old coating has to be fully sanded off first. Stain applied over polyurethane cannot reach the timber and will not bond.
Can you change a dark stained floor to a lighter colour?
Yes, but it takes deeper sanding to remove the old stain from the timber. Depending on the species and how far the stain penetrated, bleaching may also be needed to reach a genuinely pale colour.
How long after staining can I walk on my floor?
It depends on the coating system and the weather, but light foot traffic in socks is usually possible within about a day of the final coat. Furniture and rugs need longer while the finish cures. We confirm exact timings for your job before we start.
Can you stain floating floorboards?
Usually not. Most floating and engineered floors have a factory finish and a thin timber layer that cannot be sanded enough to take stain, and laminate cannot be stained at all. Solid timber floorboards are the ones that suit staining.
Does stain protect timber floors?
Stain on its own adds colour, not protection. The clear topcoat applied over it is what protects the floor from wear, spills and UV, which is why every stained floor is sealed afterwards.
Business Details
- revolutionfloorsanding@gmail.com
- +61406261606
- 55 Pyrmont Bridge Road Pyrmont NSW 2009
Areas We Service
-
Thinking about staining your floors? Call Revolution Floor Sanding on 0406 261 606 or contact us to see test colours on your own floor and get a free quote anywhere in Sydney.